This is the tale of one such piece of furniture and its transformation from an old, unattractive garage sale piece to a modern chair that I actually love.
So here is exhibit A. The chair in all its glory, pre-reupholstery.

Not the ugliest thing you've ever seen, but the skirt and thick, denim, cord-like material definitely give away that its prime was many decades ago. So I decided to save this chair from its inevitable end at next year's garage sale.
Before I started, I read a ton of re-upholstery tutorials and blog posts. And basically, I gathered two pieces of wisdom:
1. Take off the upholstery in order of what piece is "on top" of the others and remember the order you took them off in. (more on this later)
2. Keep all the pieces you take off so that you can cut the new ones the exact same size and not waste fabric.
Here is a little more explanation of rule #1. You need to look at your chair and determine which piece of fabric was put on last. It's important to keep this order because this is how you hide the staples that you use to attach the new fabric. Complicated, I know. But this process turns out to be more of a science than an art.
On my chair, the back piece was put on last. So that's where I started.
There was a strip of metal with spikes on it in each side of the back panel. The fabric is folded over this strip and then the strip is hammered to the wood of the chair. Clever little trick to hide the fabric edges. You can see some of the metal spikes in the picture sticking out of the cloth that is pulled back.

Goodbye back panel!

A pair of pliers and a flat-head screw driver were the tools that worked best for me in getting out the fabric staples. But be warned, there are about ten thousand, so unless you want your hands bearing the scars of your project, I advise wearing work gloves.
On to the sides, which also used these handy metal strips.

Some of the pieces also had cardboard strips under the staples to prevent pull on the fabric. I didn't save these to put back on, but if you are using a thin fabric, you may want to get some so that your fabric doesn't have so much strain on it from the staples.

Next, the wings. These were tricky because they had double-cording to hide the staples that held the wing pieces on. I kept the cording to make my own with when I got to the recovering part of the project.


This is what the wing piece looks like without the cording to hide all the staples attaching it.

Once I took the wing pieces off, there was a foam layer that had been attached over the edges of the wing tops. I decided to leave this on the chair and simply put my fabric over the fabric that the foam covered instead of ripping up the foam and risking tearing it.


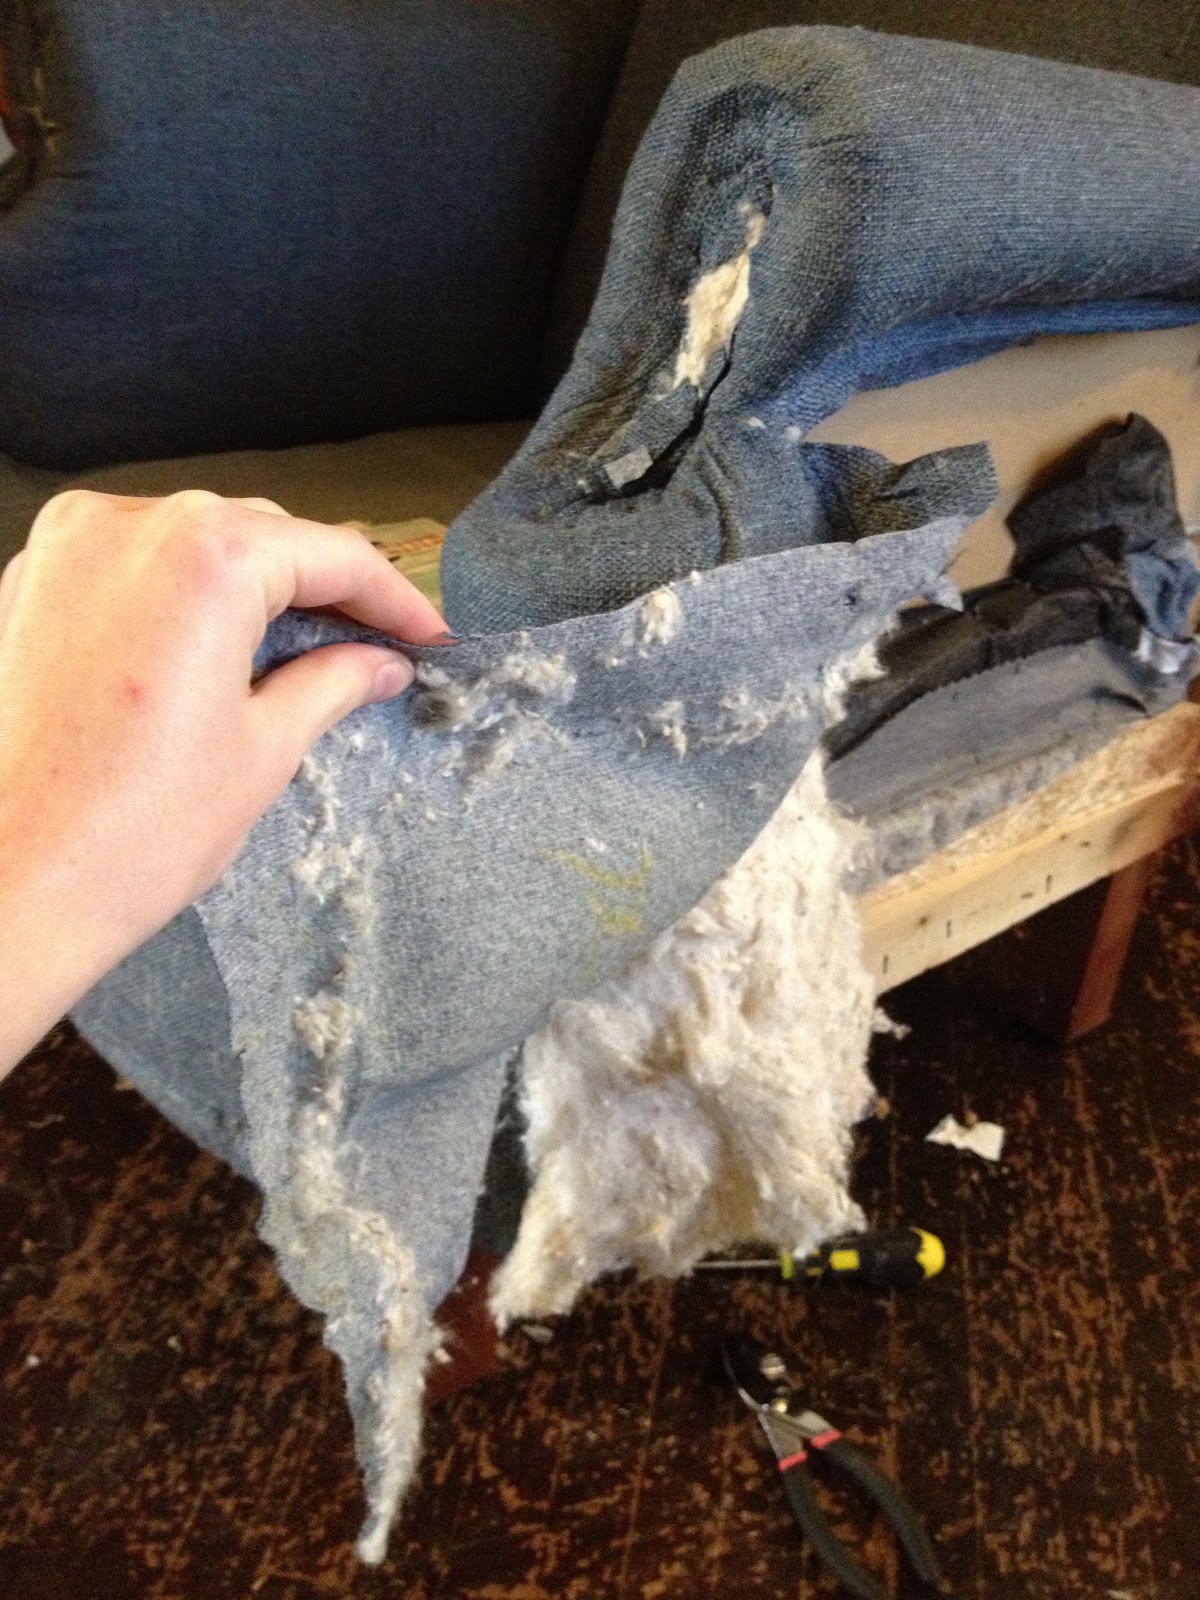
On to the arms. These were interesting because the once white batting underneath them was so old that it came apart easily and stuck to the fabric I was pulling off. I saved it as much as I could to avoid buying all new batting and really, you can't tell at all on the finished product.
This next part was probably the most complicated of the entire thing. The arms of the chair has these fancy little pieces with cording around the outside. I pried them off with the screw driver and found that they were actually attached with nails on the backside. If your chair has anything like this, be sure to keep these and simply recover them instead of trying to come up with something to use in their place.


Then just keep on ripping off that fabric.

Soon, your ugly chair will look something like this. Not necessarily a step in the pretty direction, but I promise, its all part of the process. After taking off the second arm piece that is still on in this picture, I decided that the very front bottom piece, the inside wing pieces and the backrest piece were better left in place and simply covered over with new fabric. This would allow more strength with two layers of fabric and save me the trouble of having to redo the foam on the outside of the wings to get the inside pieces off.

This is where the new fabric comes in. I chose a blue chevron (although it will look grey in the upcoming pictures) from Hobby Lobby. Gotta love those 40% off coupons. I bought 7 yards, although I definitely only used about 5. As an amateur, I figured better too much than not enough.

And I began the recovering process. Honestly, this was the easy part. When I was dismantling the old fabric pieces, I made a pile of them (in order) so that I could simply work backwards through the pile when attaching the new pieces. I cut the fabric exactly the size of the old pieces, which eliminated a ton of measuring and mess-ups. For my weapon of choice in this stage, I borrowed a staple gun from my parents that held small upholstery staples (from Lowe's or Home Depot).
For the cording, I simply sewed new fabric over the old instead of taking the cording completely apart. This proved easier than expected and I definitely recommend minimizing your deconstruction.
For the double cording on the wings, I just wrapped the new fabric around the old and sewed it tight first, then sewed a line down the middle. The crease in the middle provides a place for staples that is almost unnoticeable.

One by one, I stapled the new pieces back on in the opposite order I took them off to hide the edges. I reused the metal strips, although some of them had to be re-bent and reshaped a bit.
Eventually, I got here! Visible progress at last!

The cushion was the part that required the most actual sewing knowledge (of which I am extremely lacking). So this chair went cushion-less for several days while I struggled through making a new cover.
But eventually, I finished it. And now we have a fun addition to our living room that doesn't look like something out of my great grandparents house.
